Lamb Shank: 7 Irresistible Steps You’ll Love To The Perfect
Lamb shank is one of the most succulent and flavorful cuts of lamb, ideal for slow cooking. The bone-in shank,…
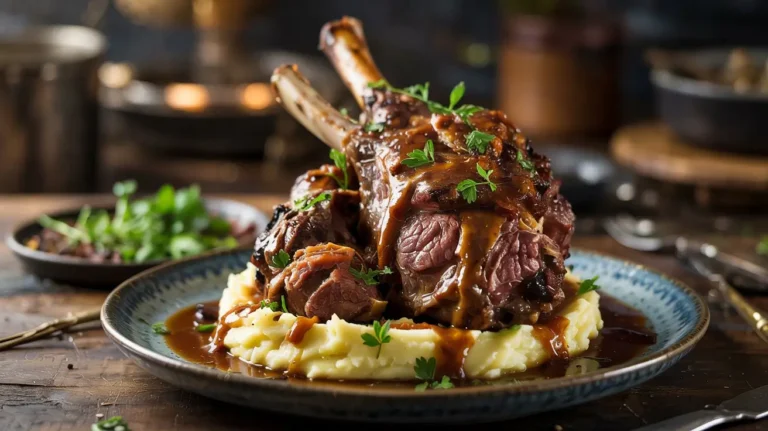
Lamb shank is one of the most succulent and flavorful cuts of lamb, ideal for slow cooking. The bone-in shank,…
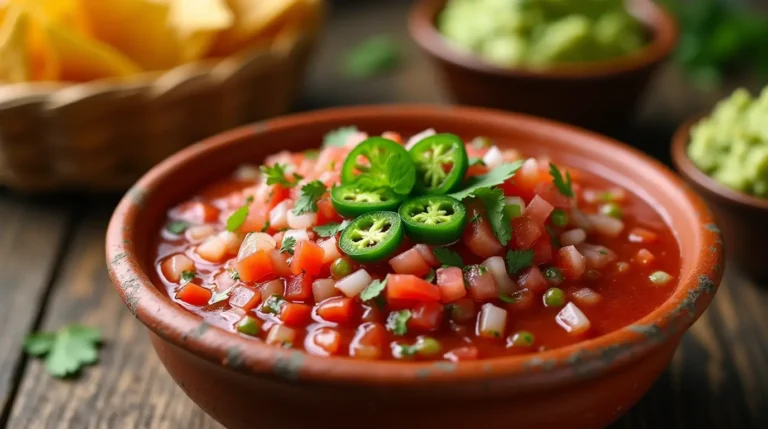
There’s nothing quite like the fresh, vibrant flavors of homemade salsa. Unlike store-bought versions packed with preservatives, making your own allows…
Florida Shrimp Pie is a delicious representation of the state’s rich seafood traditions. Combining sweet Gulf shrimp with a flaky,…
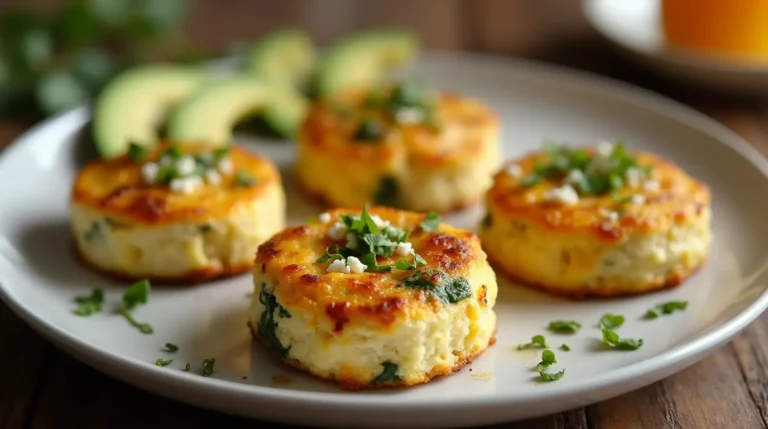
High-protein egg white bites are a delicious, low-calorie, and protein-packed breakfast option that has gained popularity among fitness enthusiasts, busy professionals,…
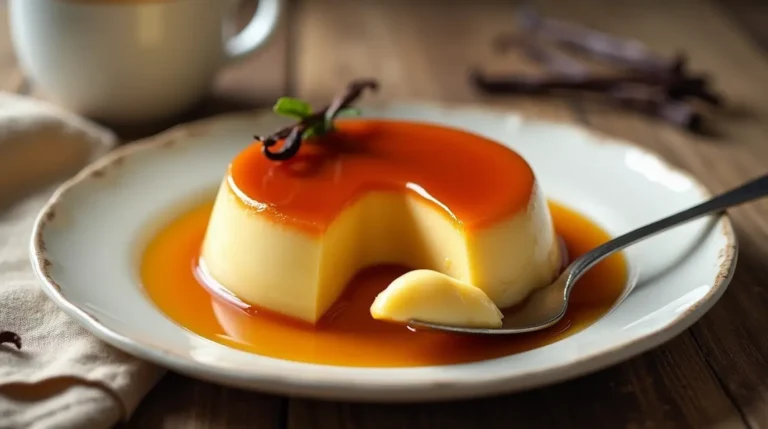
Flan is a timeless dessert known for its silky-smooth custard and rich caramel sauce. Popular in Spain, Latin America, and…

Stuffed potato pancakes are a mouthwatering variation of the traditional potato pancake, offering a crispy exterior and a flavorful, gooey filling….
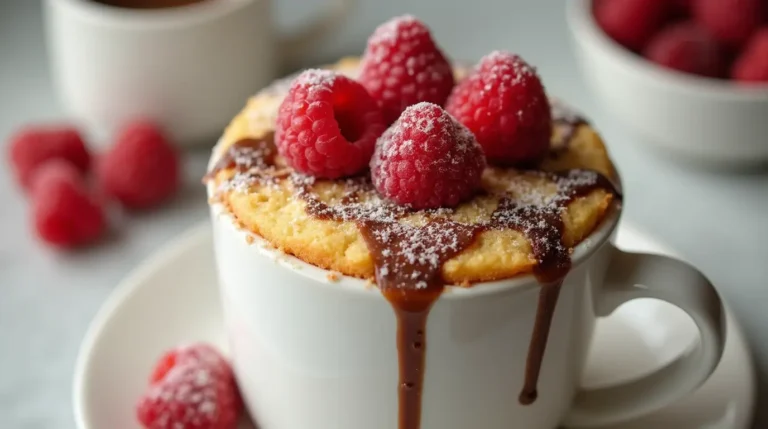
If you’re looking for a fast, easy, and healthy dessert, an almond flour mug cake is the perfect solution. This…
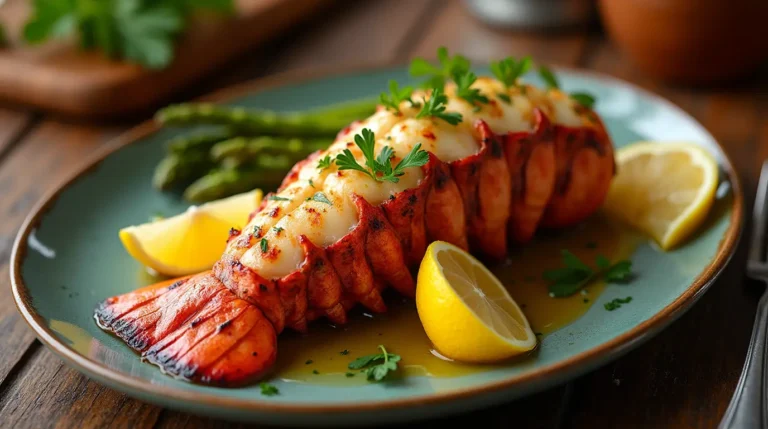
There’s something undeniably special about grilled lobster tail. Whether it’s the succulent, buttery flavor or the impressive presentation, this dish is…
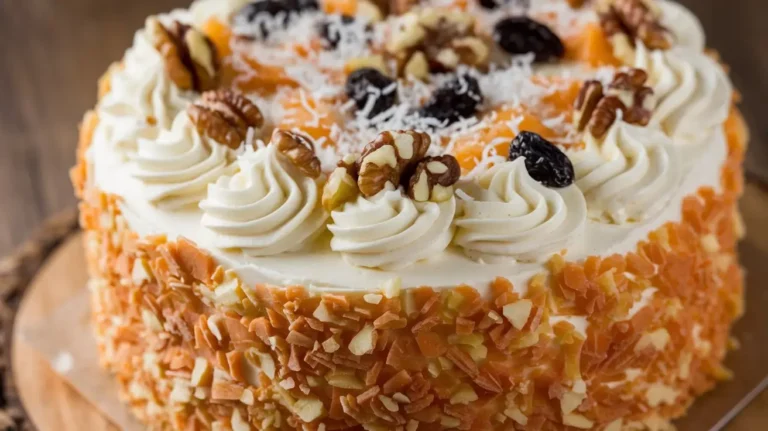
If you love moist, flavorful cakes, this Carrot Pineapple Cream Cake will become your new favorite. Combining the natural sweetness…
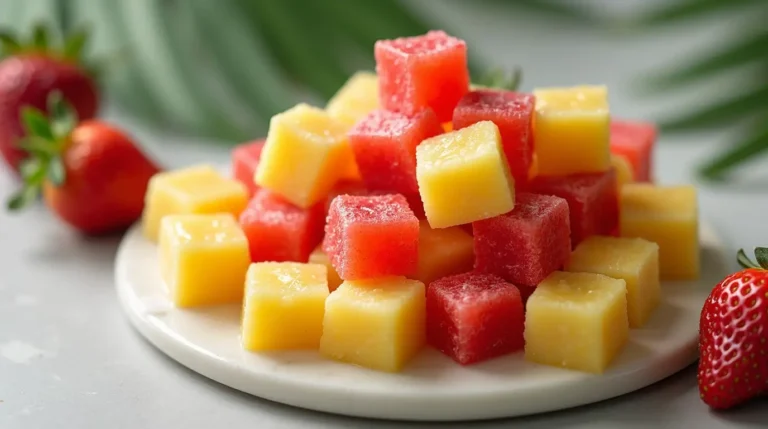
If you love fruit-flavored sweets, then pineapple and strawberries candy is a treat you won’t want to miss. Combining the…